How to use the Bectu Knowledge Hub
Bectu’s new knowledge hub gives reps the ability to publish web pages and resources for their members, as well as giving reps information on their branch or section membership.
You can access the Knowledge Hub at union.Bectu.org.uk
This guide explains:
- Navigating around the Knowledge Hub
- How to create new web pages
- How to create resources
- How to view details about your members
Navigating around the Knowledge Hub
The Knowledge Hub is where members can go to find the information that is most relevant to them and their membership.
All members will have a knowledge homepage, which will give them personalised feeds, relevant to them and their membership. For example, as a rep, you will have a “Latest resources for reps” feed and all members will have a “Latest additions” and branch feed.
From the knowledge homepage, members can click to explore more information about their branch (and section, if the content exists).
There is also the knowledge library – this is a collection of all documents (and some other resource types) for Prospect members going back to the early 2000s.
Reps with certain roles can manage content for their branch and section (depending on what level their role is at). They can also view information about their members individually or their membership as a whole. See below for more information on how to do this.
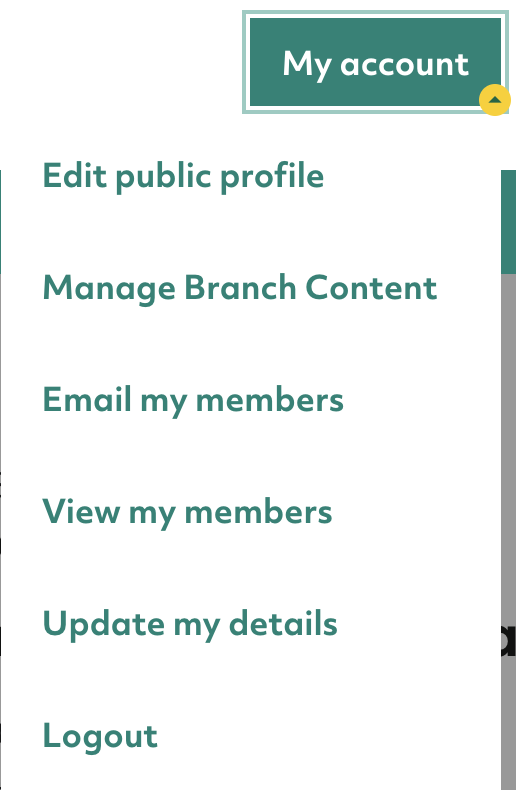
The my account menu links to the member portal, where members can update their details and manage their membership, using the “update my details” link.
How to create web pages
For Chairs, Vice Chairs, Secretaries, Assistant Secretaries and Communications Representatives
Each branch has a homepage on the Knowledge Hub, which looks like this:
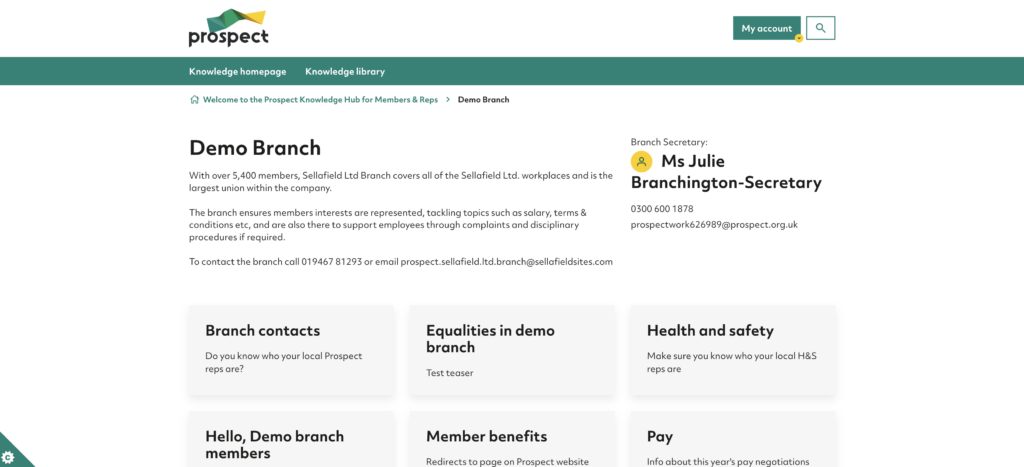
The introduction text can be up to 500 characters long (including spaces) and will have been submitted to us in advance of the site launching. Don’t worry if you haven’t sent us this yet, we will be doing another call out for this soon after launch. This text is viewable by the public so should aim to attract non-members to your branch.
You can add new static web pages to link to from your homepage. These pages are designed to house essential member information related to their branch – it could be branch contacts or a health and safety policy, for example. One of these pages can be public and the rest will only be visible to logged in members of your branch.
To create a new page, go to the “My account” menu and select “Manage branch content” – you can also see this link on the knowledge homepage.
Then, next to the “Branch pages” heading, choose “Create new page”. Fill in the following fields:
- Title – the title for your page
- Teaser – a short description of your page which will be visible on your branch homepage.
- Rep role – if you have multiple roles, you can choose which one to publish content as.
- URL – if you want to link away from union.prospect.org.uk, paste the URL you want to link to here. If not, leave this field blank.
- Cover image – if you want to add an image to your page, you can do so here.
- Alternative text – if the image is purely decorative, leave this field blank. If not, insert a description of the image for people who use assistive technology such as screen readers.
- Body content – put the text of your page here.
- Add another section – if you want to add another image and block of text, you can add as many sections as you like.
- Audience – you can choose to show this page to your branch or particular sections or sub-sections if you have a role at section or sub-section level.
- For public? – if this is chosen, the page will be sent for approval and, once approved, the public will be able to see the content on it.
- For reps only – if this is chosen, only reps in your branch will be able to view the resource.
You can then save your changes as a draft or publish the page immediately (or submit it for approval if you have selected a public audience).
Once published, your page will appear on your branch (or section) homepage. It will not appear in the knowledge library or on members’ knowledge homepages.
Note, sections and sub sections don’t automatically have a homepage on the Knowledge Hub, but if you would like to add a homepage for your section or sub section, please email [email protected] and one of our team will be in touch with you.
How to create resources
For Chairs, Vice Chairs, Secretaries, Assistant Secretaries and Communications Representatives
As well as adding new static web pages for your branch members (accessible from the branch homepage – see above), you can also add resources for your members – these will be shown to members on their knowledge homepage and on the branch homepage.
Resources take five forms:
- Documents
- Articles (a dated web page)
- Announcements (same as an article but these will take priority in members’ feeds so are best used for information on things like ballots)
- Audio
- Video
To create a resource, go to the “Manage branch content” page (accessible from your knowledge homepage or your “My account” menu. Scroll down to “Resources” and select “Create new resource”.
You will then be given the option of which type of resource you would like to add. Choose the appropriate resource type and then fill in the fields on the next screen. You will be given similar fields as those for web page above and the fields will differ slightly depending on which resource type you choose.
The fields that only appear for resources are:
- Publication date – this is the publish date for the resource. You can set it to the current date or in the future (in which case it will be published on the future date you choose.
- Expiry date – resources with an expiry date will disappear from the website on the date you choose. This might be helpful if your resource is particularly timebound and you don’t want people accessing it after a certain date. Expired resources will still be visible by you on your manage branch content page and you can restore them if you like.
- Upload – You can upload files relevant to your resource and this field is mandatory for document, audio and video resources.
- Search resources – you can link resources to each other by choosing from your other previous resources to highlight within this resource as a related resource.
- Related link – this will highlight a related link at the bottom of your resource page – you may want to link to a webpage with more information about the topic that the resource you’re creating is about, for example.
- Topic tag – This is optional, but you can choose from one of five topics for your resource which members can then filter information about on their knowledge homepage and the knowledge library.
- Audience – you can choose which audience (branch, section or sub-section, depending on your role) to show the resource to. You can also choose whether to show it to reps only. You can’t create public resources, however.
You can then save your changes as a draft or publish the resource immediately.
Once published, your resource will show on your members’ knowledge homepage and on your branch (or section) homepage, below any web pages you have created.
How to view details about your members
For Chairs, Vice Chairs, Secretaries, Assistant Secretaries, Membership and Recruitment Secretaries and Organising Representatives
Click on the “My account” menu on the top right of the screen and select “View my members”
You will then see a page with some snapshot statistics of your membership, along with a list of members.
You can use the search box to search for specific members by their name, membership number, workplace or employer.
If you click “view details” next to a member, you will get more information about that particular member.
If you click the “Filter” button, shown below, you can filter the list of members by various criteria, including date joined, date left, employer, workplace, position (rep role), whether or not they’re a homeworker, whether their membership is suspended or whether or not they have an email address.

As well as viewing this information, you can also download it – go to the bottom of the page, agree to the terms and conditions and click download. You can also download a list of email addresses only, if you like – click on the ”Members email list” button for this.